Showing posts with label Crafts. Show all posts

Friday, March 26, 2010

Easter Crafts

DLTK's Site is a favorite resource for fun crafty activities to do with my kids. They have a ton of great ideas. This weekend we are having an early Easter Celebration with the grandparents and some of the cousins (wish you were here....). I decided to find some fun easterish activities to do with the boys to get them introduced to the idea of Easter Bunnies and egg hunting. I found templates on the DLTK site for an Easter Egg Mosaic and a bunny hat. So, I got out the craft supplies and we made some Easter crafts!!
We first did the Easter Hats. I printed out the ears template and let the boys color them. Then they helped me cut them out and I let the one waiting continue to color their ears. They did a much better job with coloring when they were cut. Then I taped two halves of a piece of white card stock together and let them color that. Then I taped the ears onto the hat, and taped the hat around their head. They love their bunny ears.
Next we did the Easter Egg Mosaics. First I cut the egg template out. Then, I pre cut strips of colored card stock for the boys to cut from. We took turns choosing a color and then cutting 'squares' out of it (reinforcing yesterday's learning). Of course not all were squares but this is only their third time using scissors. I helped them and said open, close, open, close.
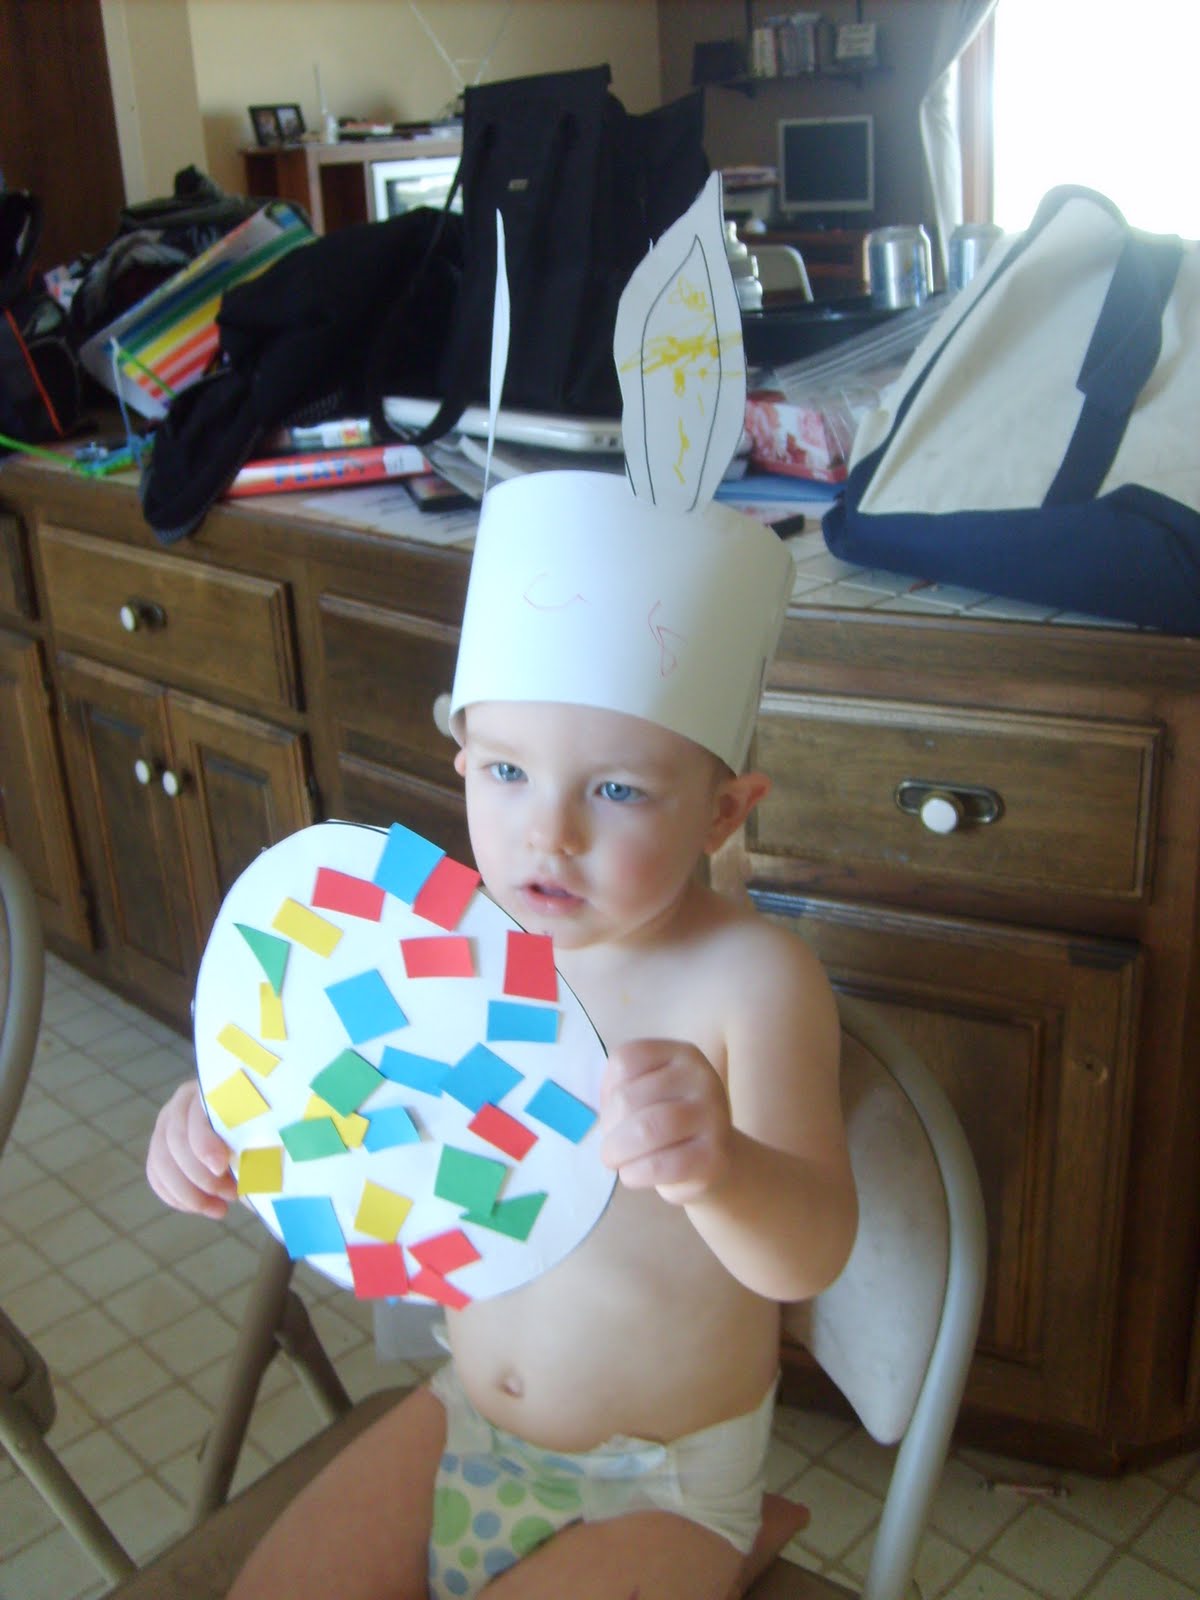
(forgive the clothes, hair and makeup less face...., oh and the mostly naked children....)
Thing 1 opened his mouth along with the scissors each time I said open :)
Thing 2 got a very concentrated look on his face.
I let him try to open and close the scissors by himself and was a little afraid of loosing some fingers....thus the look of fear on my face. No worries, no one was harmed while using the scissors ;)
After cutting their 'squares' out I covered the egg with glue stick. Then they could just stick their 'squares' on. It was nice to have one gluing while the other cut, keeping them both happy and occupied. After they were all finished I put three strips of clear packing tape over their egg to keep the pieces on.
Here are the proud boys with their completed projects!!
(Thing 1 was a little concerned that his 'squares' kept falling off, but some packing tape solved the problem and now I don't have to worry about their little sister finding a bunch of 'squares' to put in her mouth....)
I think this was a very fun, successful project. I will be reading them some stories about Easter, and Christ and talking more about the Easter Bunny this next week.

Sunday, February 14, 2010

Friday: Valentine's Art

For Valentine's Day Angel Girl did this. For us it was hard to get her little hands to make such perfect hearts so I just drew a heart around the prints. Either way it turned out super cute...and daddy loved his card.

Wednesday, February 10, 2010

Monday/Wednesday: Beading Sequence

Going along with sequencing I am doing some math patterns. Originally on Monday I was going to do an AB pattern (only 2 colors) but I realized that this was a completely new activity to Angel Girl. So for Monday I pulled out her beads and let her string any way she wanted to. This was to help her get the idea of stringing. Then I put it on her like a necklace. Then on Wednesday I started with a very simple AB patter. Pink/Purple/Pink/Purple. This is not a concept I expect her to master or even really understand fully just begin to see. So I helped her with picking out the next bead. She really likes having the necklace to where. It also helps with her fine motor skills to string beads onto a piece of string.

Saturday, March 28, 2009

Art Projects for Kids

Art Projects for Kids is a blog that teaches how to do different art projects with children. The tags divide it by age so you can search by grade or our you can search by medium.

Monday, March 9, 2009

Artful Parent

Artful Parent is a blog about doing art with children. It has tried and true activities for parents to do with their children.

Monday, March 2, 2009

Martha Steward Kids

What can go wrong when its Martha! So here is the link to Martha Stewart Kids. It has crafts for kids. Ideas for cooking with kids and ideas for birthday parties. So check it out!

Sunday, February 8, 2009

Kid's Crafts

DLTK is a collection of crafts for kids. It has coloring pages along with fun crafty activities. It is a divided by sections including holidays and cultural activities.

Tuesday, February 3, 2009

Crafts for Kids

http://www.notimeforflashcards.com/
This is a website that has educational crafts for kids. I thought it had some cute things in it. Check it out!!!

Monday, November 3, 2008

Quiet Books

Taken with permission from the book “How to Make an LDS Quiet Book” by Ann F. Pritt, with adapted instructions. Website: http://theideadoor.com/Printables/how_to_make_an_lds_quiet_book_by.htm

*Materials:
1 yard 48” wide Muslin
½ yard lightweight iron-on/fusible pellon
1 yard 48” wide medium to heavy weight iron-on/fusible Pellon
OR 2 yards 24” wide medium to heavy weight iron-on/fusible Pellon
Iron and Ironing Board
Presser cloth
Cutting Mat
Rotary Cutter
Scissors
Ruler
Sewing Pins
Sewing Machine with thread
*These materials will be needed for every page*

Instruction for Pages:
Cut 12 strips 12” x 24” out of the muslin and the medium to heavy weight iron-on/fusible pellon. This will give you 12 pages, 6 front to back, in which to make into a quiet book.


‘Josephs Coat of Many Colors’ Instructions
Materials:
5 sew-on snaps, all the same color
Fabric Markers
5 pieces colored felt

Instructions:
1. Folded edge will be outside edge, Place pattern under one sheet Muslin and pin in place. Leaving enough room on all sides for finishing the edges, and having the pattern page a little extra on the unfinished edge to allow room for eyelets, or sewing into the book.
2. Trace the pattern onto muslin (leaving pattern pinned under muslin). Trace all but the snaps placement.
3. Use the coat strips pattern and trace onto lightweight pellon (when tracing onto Pellon trace onto non-bumpy side).
4. Cut pellon pattern and iron onto lightweight pellon using a presser cloth. Make sure when you iron on you are doing it correctly so you don’t flip your colors on your coat.
5. Cut out coat strips and place on traced page to see what order to color Josephs coat.
6. Color traced page.
7. Hand sew snaps onto felt pieces and Joseph’s coat.
8. Remove pattern, and flip over to do the next page.


Tower of Babel’ Instructions
Materials:
Two pieces different colored felt
Fabric Markers
Pinking Shears

Instructions:
Folded edge will be outside edge, Place pattern under one sheet Muslin and pin in place. Leaving enough room on all sides for finishing the edges, and having the pattern page a little to the unfinished edge to allow room for eyelets, or sewing into the book.
Trace the pattern onto muslin (leaving pattern pinned under muslin). Only trace the people and the title.
Color people.
Trace both tower patterns on non-bumpy side of lightweight Pellon paper.
Cut out each of the whole tower pattern (not individual pieces of each tower).
Iron each pattern onto different colors of felt using presser cloth.
Use pinking shears to cut out individual tower pieces, keep pieces in order.
Place tall(up/down pieces) tower first onto muslin, pin and sew into place.
Place side tower on muslin, pin and sew into place.

Instructions for finishing page once both sides are completed:
Iron-on medium to heavy weight pellon to back side of Muslin using a presser cloth.
Sew right sides together, leaving a space on the bottom of the page to flip to correct sides.
Cut corners off, and trim thread.
Invert page, and press corners in from inside.
Hand sew bottom to finish page.
Admire your finished product!!!!

Wednesday, October 22, 2008

Super Saturday!!

Here are the six crafts we are doing for SUPER SATURDAY!!


Christmas Tree Air Freshener
$2.00
I don't have any directions or links to this craft, because it was developed and found by someone else. When I get instructions I will link them. Basically, its one of the standing air fresheners with Christmas fabric, buttons, and straw to make it look like a tree on top.


Proclamation to the Family
$12.00


I don't have any instructions for this quite yet, I have yet to develop the instructions. When I have them I will link them. For now, here is a link to the "Living Christ" frame this was adapted from. http://theideadoor.com/RS/crafts/living_christ_picture_and_matt.htm

Tile Magnets and Coasters

$2.00 for a set of 4

The link will show you how to make the coasters, we made them magnets because we found that the coasters would cause the color to spread. http://www.mormonchic.com/crafty/holiday-crafts.asp

Pot-Holder First Aid Kits

$1.55 for Basic Kit, $6.00 for Complete Kit

Potholder First-Aid Kit - You will need a simple square potholder with the loop in the center of one side, some "snack" size Ziploc bags and a button. Stitch the bag bottoms in the center of the potholder. It helps to put half of the bags on one side and the other half facing the other way - bag bottoms overlapping in the center. With a sewing machine just zig-zag them to the potholder. Sew the button on the opposite side of the loop so you can close the kit. Then fill it up with supplies like band-aids, safety pins, coins, hard candy, button, wipes, sample packs of Pepto-Bismol, Motrin, Neosporin, etc. It's quick and simple!

We made each seperate baggie have a different 'kit': First Aid Kit, Personal Kit, Sewing Kit, Feminine Hygiene Kit, Medicine Kit, and Misc Travel Kit.

Here is another website with detailed info on how to make this: http://www.associatedcontent.com/article/75639/potholder_first_aid_kit_a_great_last.html?page=2&cat=24


Holiday Cards

$3.00 for 3 cards

The crafter in charge, found their own cards to make. Here are some websites that contain instructions on how to make some holiday cards:

http://www.bhg.com/bhg/search/results.jsp?searchType=content&searchString=Christmas+Cards&_requestid=268393

http://www.bhg.com/holidays/christmas/cards/make-your-own-christmas-cards/?page=1


http://www.bhg.com/holidays/christmas/crafts/christmas-nativity-cards/

Snow Globe

$7.00

Adapted from this website: http://www.bhg.com/holidays/christmas/gifts/do-it-yourself-snow-globe/ We found that plumbers glue worked best for sealing the water in.

Quiet Books Websites

Here are a few links with quiet book patterns and information.
http://www.theideadoor.com/Printables/how_to_make_an_lds_quiet_book_by.htm

http://fowlerfam.blogspot.com/2008/02/quiet-book.html

Enjoy!!